Sample Custom XSL-FO Report for APEX
This document will show you how to create a custom print report for Oracle APEX. The Report is based on the Oracle APEX Sample Application (application alias DEMO_APP).
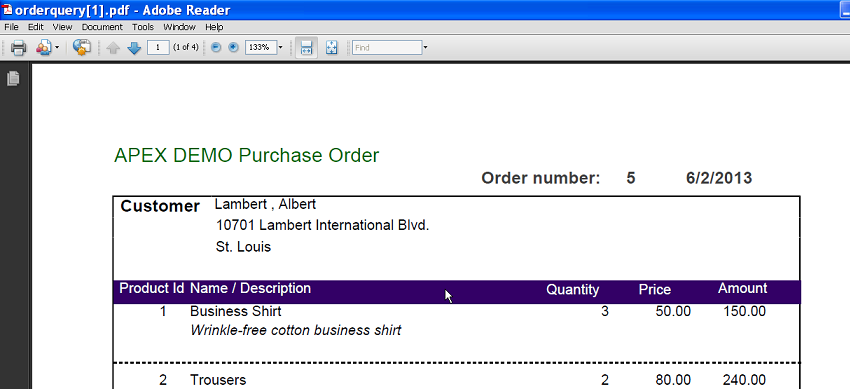
The report will create a custom report for printing sales orders and including the list of articles with prices and images.
This will show you:
- How to create a master detail report.
- How to use a multiquery report.
- How to create a report with 2 templates.
- How to calculate lines amounts by multiplying price by quantity.
- How to add images to your report.
Step 1. Create the Report Query
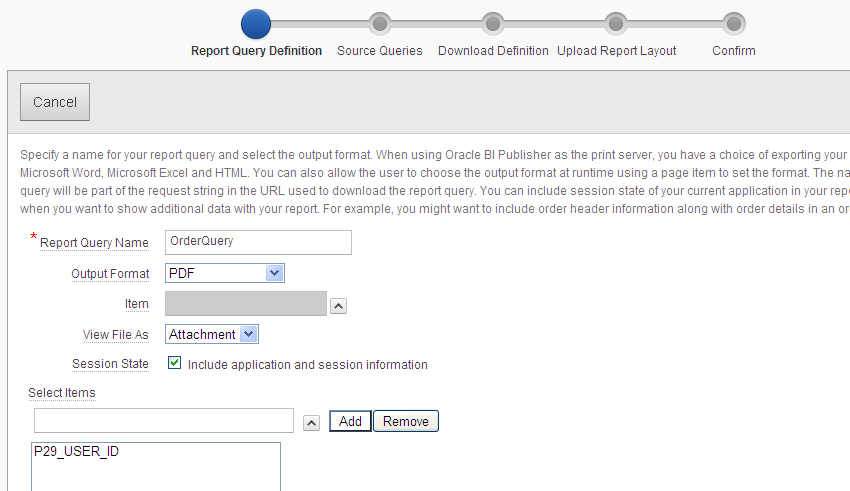
Create the report query from the "Sample application -> Schared components -> Report Queries -> Create"

Enter the Report Query Name and select the item "P29_USER_ID"
New enter the first query in the next step.
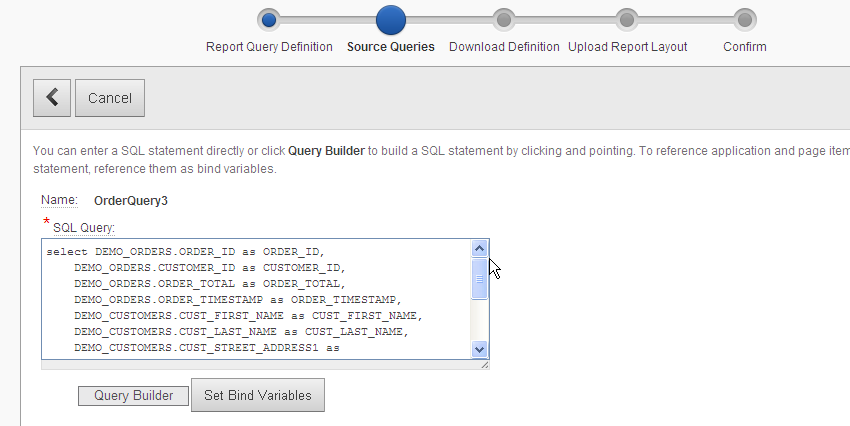
Select "Set Bind Variables" and enter the value 8. You will need this to create the test data.
After data select "Add query" and repeat the process for the second and third query.
Once you have done that, select
- "XML Data" and "Download",
- "XML Schema" and "Download"
You will need these 2 downloaded files in the J4L FO Designer later.

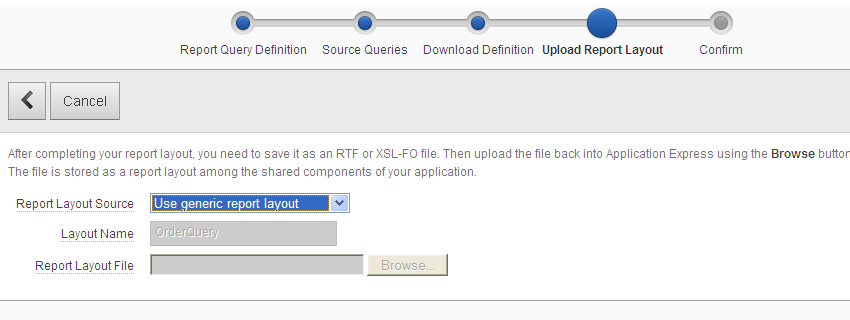
Click Next and select "Use Generic report layout" as Layout Souce. You will change this later once you have designed the layout in the designer.
Step 2. Create the custom report using J4L FO Designer
Once you have downloaded the test XML data and the XSD (schema) file, you can create the report template using the J4L FO Designer. We have already created a test template for you. It is called APEXOrder.fo.
The complete set of files you will need for the J4L FO Designer are:
- APEXOrder.xrp template that can be imported in the J4L FO Designer.
- XML Data
- and XML Schema.
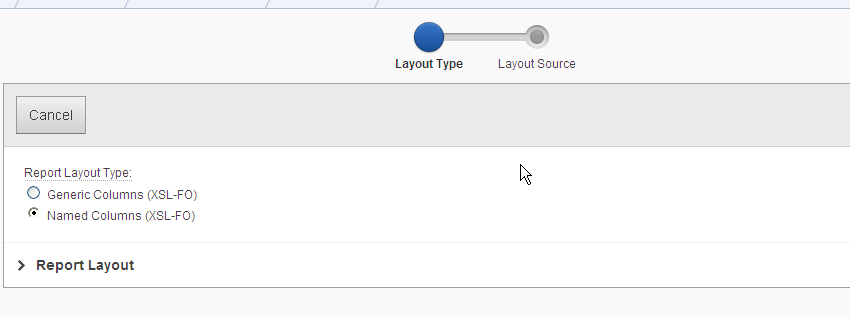
Step 3. Create the report layout in APEX
Create a new report layout as shown below:

Select "Named Columns"
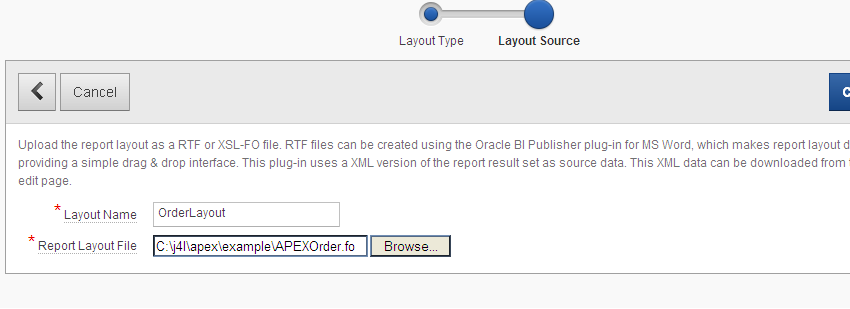
Enter the layout name and select the APEXOrder.fo file created in the previous step. After that select "Create layout".
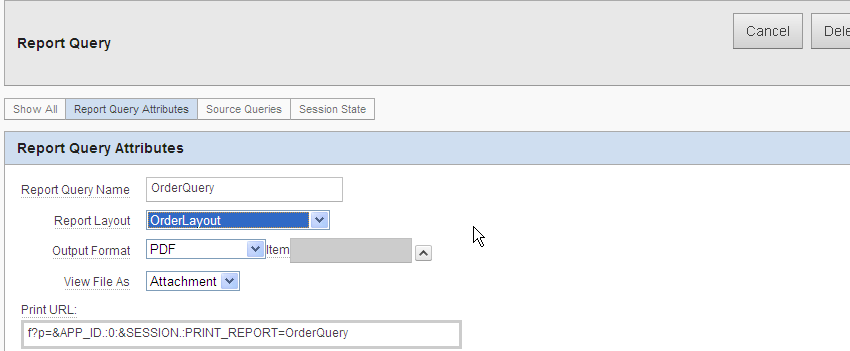
Now edit the Report Query "OrderQuery" and select the Report Layout you just created.
Step 4. Add a print button in the demo application
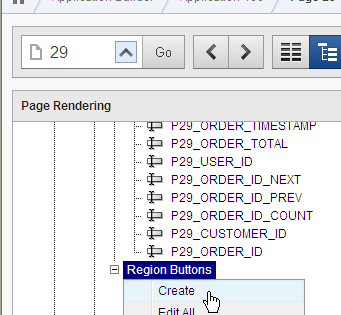
Add now the print button in the "Order Details" page. Select this page in the application:

In the Region Buttons item select "Create".
Add a Name and Label to the button:
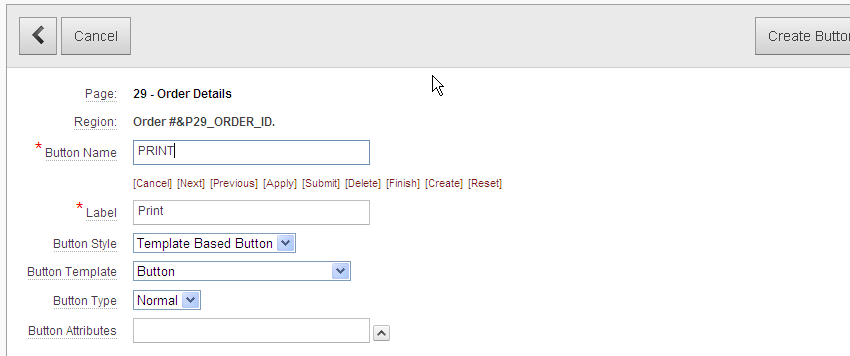
Select position "Region template Position ##Change#"

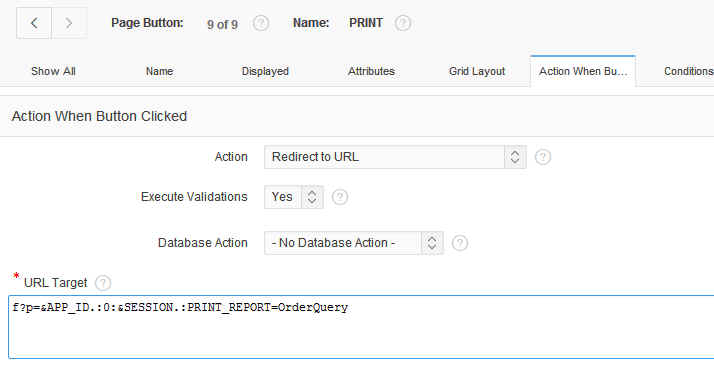
As Action select "Download Printable Report Query" and the Report Query "OrderQuery". Then select "Create Button".
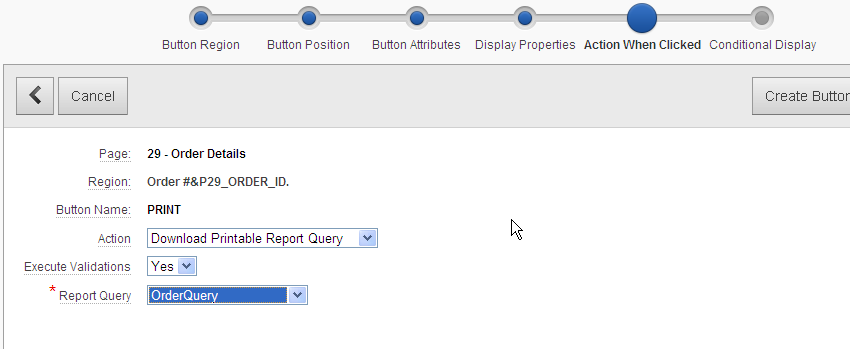
Note for Apex 5 you would select Action Redirect to URL and use the Report Query URL as target URL.
Step 5. Run the application
Run now the APEX sample application and select one of the orders. In the order details page you will see the new button "Print"
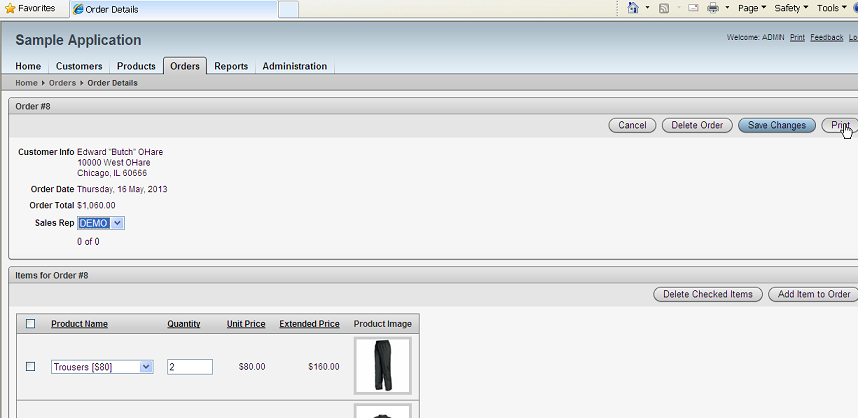
Click on the print button to create the PDF file.