Installation of the Subversion environment for teamwork
Subversion and the FO Designer
This document describes how to setup Subversion on windows. Subversion
is a source code management system which can be used as central repository
for your FO Designer projects.This means you can share your projects with
other users. At the same time Subversion provides also version management.
The steps to follow are:
- Download and install Subversion for windows
https://sourceforge.net/projects/win32svn/
run the msi file.
- After the installation create the repository "svnrepos"
with these windows command:
svnadmin create /svnrepos
- Within that newly created folder c:/svnrepos uncomment the
following lines in the conf/svnserve.conf file by removing the
pound character from the start of each line
anon-access = none
auth-access = write
password-db = passwd - Next, add some users to the conf/passwd file. For example we
create here a user called ADMIN:
[users]
ADMIN = ADMINPSW
- Install the windows service as follows. Open a command window as
administrator and run:
cd c:\Program Files\Subversion\bin\
sc create svnserve binpath= "svnserve.exe --service -r c:\svnrepos" displayname= "Subversion Server" depend= Tcpip start= auto
- Start the server with the command:
net start svnserve
The Subversion protocol runs on TCP port 3690, so make sure your Firewall does not block that port.
- Install the SVN plugin in the FO Designer (see user
guide)
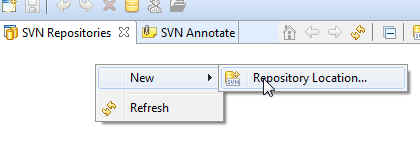
- After the plugin installation in the Windows-->SVN
perspective, select:
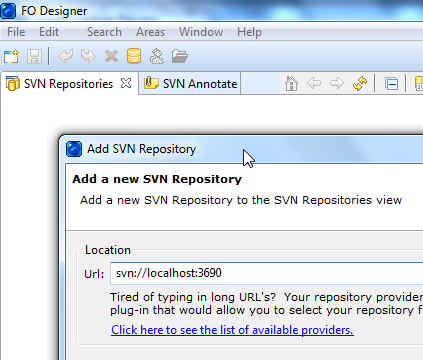
- Add the URL to your SVN server. In this case we have the server and
the designer on the same computer, therefore we use localhost:
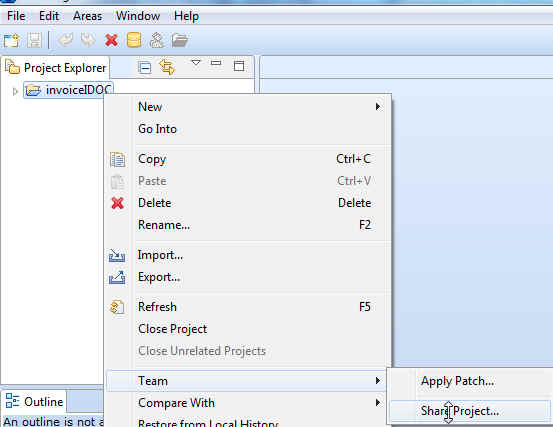
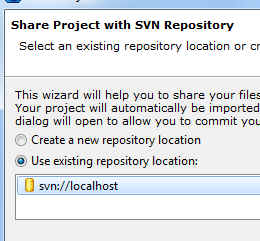
- Now in the designer open the "Designer perspective",
select one of your projects and "share" it. This will
add your project to the central SVN server:
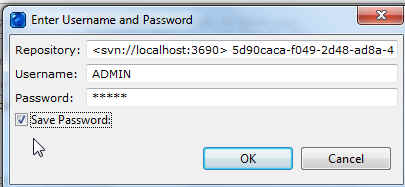
- The first time the system will ask you to select the repository and
enter the credentials. In this case we use the user ADMIN however you
should have a separate user created for each developer (not the
administrator)
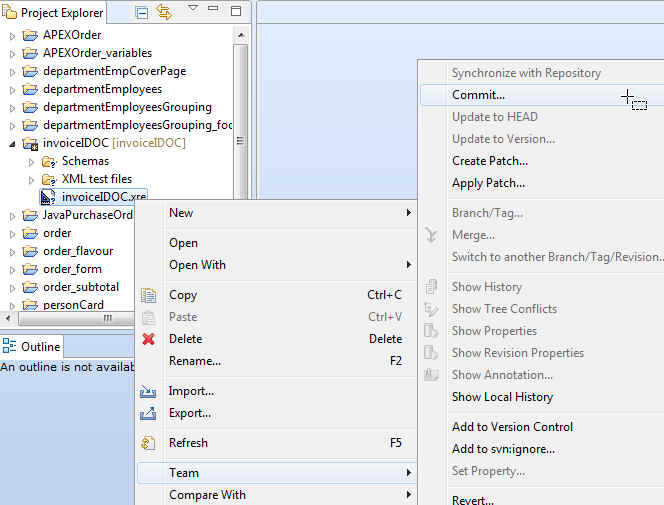
- Next add every single file of your project to the repository using
the commit item:
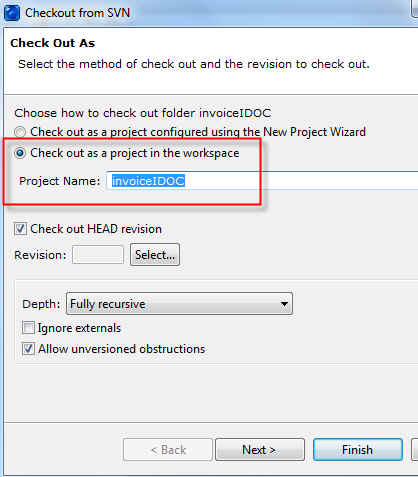
- Other developers can now see your project in the repository (in
their "SVN perspective" in the Designer) and
use the checkout option to get a copy of it
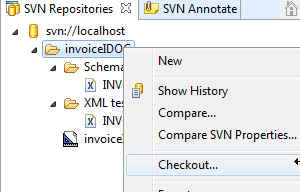
like this: